Wednesday, December 18, 2013

Spices for Christmas Cake...Black and White Wednesday #110

I  will be baking a cake for Christmas with four spices, Cinnamon, Star anise, Cardamom and Nagkeshar. I plan to  keep it gluten free by replacing all purpose flour with  few multi grain flours. Following whole spices image I am sending to Cinzia for Black and White Wednesday #110, Next BWW event  #111, January 8th 2014, will be hosted by Lynne at Cafe Lynnylu. For future event hosting schedule refer Cinzia's post. Susan from Well Seasoned Cook has  founded this event.

Star Anise, Cardamom, Nagkeshar and Cinnamon sticks.


Black and White Wednesday
 Event #110

Friday, November 8, 2013

Curry leaves and Coconut Chutney with fresh Mango Ginger root. [Aromatic Sweet-Sour-Spicy Chutney for mini Uttapams]

This coconut chutney is filled with goodness of fresh Mango Ginger root (Curcuma amada/ Ambe Halad) and fresh curry leaves, two strong medicinal and aromatic ingredients are blended together in this sweet, sour and spicy chutney. I made this chutney to serve with  multi grain rice free mini uttappams. Scroll down to check the image of pot grown curry leaves my friend shared with me. Try this medicinal chutney to explore new flavors.


Manga Inji, Curry leaves infused coconut chutney with Uttapams.

Ingredients for medicinal Coconut chutney.

Ingredients :
  • 1 Cup - fresh grated coconut
  • 3/4  Cup - fresh curry leaves
  • 1/4 Cup - sliced fresh Mango Ginger / Ambe Halad  root with skin.
  • 3/4 Cup - water, add 1/4 cup more to adjust consistency.
  • 2 Jalapeno chilies ( use tender chilies to avoid extreme heat, regular green chilies should be fine.)
  • 1 garlic clove - sliced
  • 2 Tb.spoon - chopped onion
  • 1 Tb.spoon - Coconut oil
  • 1.5 Tb.spoon - lemon juice
  • 1/2 T.spoon - sugar
  • 1/4 T.spoon - iodized fine sea salt
Method of preparing Curry leaves, Mango Ginger infused coconut chutney :
  1. Clean and thoroughly rub Mango ginger root skin under running water, slice off bruised and bad patches, roughly slice and keep it aside.
  2. Heat 1 tbsp coconut oil in a small pan, add sliced jalapeno chilies, saute over medium high heat for 2 minutes, stirring often. Any other type of green chilies can be used. If using smaller chilies saute for one minute.
  3. Next add 2 tbsp chopped onions and  one sliced garlic, saute for 2-3 minutes over medium heat, stirring often. Add  3/4 cup curry leaves saute for two minutes then add 1 cup fresh grated coconut,  mix well and quickly shutoff the heat. Allow to rest for 6-7 minutes.
  4. In a blender jar add curry leaf coconut mixture,  1/4 cup sliced fresh chopped Mango ginger root, 1.5  tbsp lemon juice 1/2 tsp sugar, 1/4 tsp salt, 3/4 cup water, (add more water if you don't like thick consistency.) Grind into fine paste.  Taste for sweet and sour balance, add 2-3 pinches of  sugar and  more lemon juice to suit to your taste, also adjust salt level.
Other method to prepare this chutney :  This chutney can be prepared in another method like we make traditional plain coconut chutney. Mix all listed ingredients except oil, garlic and onion in a blender, grind into fine paste, adjust sweet, sour, salt balance. Transfer chutney to metal or glass bowl. In a tiny pan heat 1 tbsp coconut oil, once hot add chopped onions, allow to sizzle for one minute or until onion pieces get slightly charred, quickly add sliced garlic, saute for 30 seconds. Put off the heat, pour tempering over chutney, mix well. (1/2 tsp Mustard seeds can be tempered before adding onions.) 

Serve this Chutney with idli, Dosa, uttappams or with daily meals. I used left over chutney for preparing sandwiches. I applied 1 tbsp chutney over each square slice of bread, stacked  thin sliced tomatoes and sliced onions. Sprinkled few finely sliced green chili pieces and shavings of Parmesan cheese. Pressed another bread slice over it. Sprayed oil over slices, pan roasted sandwich until both sides turned crisp and golden brown. Unique raw mango like  aroma of  Mango ginger  made these sandwiches very tasty.

Pot grown curry leaves

Kadipatta-Ambe Halad Chutney

Wednesday, October 23, 2013

Flaxseed meal and Ragi enriched roti with Aashirvaad multi grain Atta [Indian flat bread with reduced gluten - Healthy Roti formula - 2]

Recently I made rotis by adding Ragi flour to Aashirvaad multi grain aata. I tried to reduce wheat gluten by 50%, combined equal portion of Raagi and multi grain atta. I added Ragi flour by adapting  bhakari  dough making  method. I  heated water mixed with flaxseed meal, in that added  ragi flour, made a sticky dough, allowed to cool it for some time then added multi grain wheat flour.  Process of dough making, rolling, frying was easy. I made them few times to pack in lunch box. This formula worked well, roti tasted very good, just like bhakari. I left the dough  in refrigerator over night, next day roti  taste and texture was much better. These ragi enriched rotis are good  option to include healthy Ragi flour into daily diet, to know several health  benefits of Ragi check blogger sm's post.


Ingredients :-
    (Makes 6 small size Rotis.)
  • 1/2 Cup - Aashirvaad multi grain atta ( any other type of wheat flour can be used.)
  • 1/2 Cup - Ragi flour ( also known as Nachani, Maddua, finger millet)
  • 1 Tb.spoon - slightly heaped Flax seed meal (coarse powder of flaxseeds.)
  • 1 Cup water + extra 4-5 Tb.spoons
  • 1/4 T.spoon - fine sea salt
  • 1 T.spoon - oil to add in the dough.
  • 2-3 Tb.spoon all purpose flour - for dusting dough balls.
Method of preparing Ragi enriched roti :-
  1. In a medium size  microwave safe bowl mix 1 tbsp flax seed meal with  1/2 cup water. Heat over high heat for 70-75 seconds.(make sure mixture don't overflows from bowl.)
  2. Quickly add  1/2 cup Ragi flour to the bowl, mix with spoon. Allow to cool for five minutes. Add wheat flour, salt, remaining 1/2 cup room temperature water, mix with spoon until rough dough ball is formed. Add  4 tbsp water, knead the dough, you may add little more water to make soft dough based on your desired softness in handling dough. Once soft dough is formed smear some oil  around and knead for 2-3 minutes. ( For better results keep dough covered with plastic wrap for half an hour.)
  3. Make 6 equal size balls. Slightly dust each ball with flour. Roll out each ball into 5-6 inch diameter circle. While rolling turn roti clock wise, flip two three times, if needed gently dust with flour. Roll with gentle pressure, maintain uniform thickness all over roti.
  4. Fry each roti  for about 2-3  minutes by flipping two or three times. Maintain medium to medium high heat. Well rolled roti will puff  like balloon, also getting multiple puffs through out roti yields soft texture. Use roti press or ball of paper towel to gently press roti while frying. Place fried roti over paper towel lined plate, cover with metal or glass dome lid. Do wipe excess formed steam from inside the dome lid.
  5. Serve these rotis warm with  vegetarian curries, subzis ,Chicken or Goat meat curries. Addition of raw onions, green chilies and different herbs adds lot of goodness to the meal. I like to make roti roll  wrapped with finely sliced raw onions, fresh herbs, sliced raw veggies, sour cream or  cream cheese.

Finger Millet (Nachani) & Wheat flour Indian Flat bread.

Chicken curry made with soy chunks.


Chicken and Nutrela Soy chunks curry, Ragi enriched roti.
 Chives tucked in sliced onions.

Post published on 11/22/2013
Previously blogged recipe of healthy roti formula.

Tuesday, October 22, 2013

Black Swallowtail Caterpillar on Parsley herb Plant. [Black and White Wednesday #102]

This week for Black and White Wednesday event I am submitting image of Black Swallowtail Caterpillar on parsley stem. In September month I spotted one Caterpillar on parsley herb plant which is growing in the pot along with chives. I  gently lifted  caterpillar along with stem and moved it over the lawn but next day it returned back on parsley plant. It looked very pretty with black stripes, yellow dots over bright light Green body. After googling  I was pleasantly surprised to know that the same caterpillar transforms into a beautiful  Black swallowtail butterfly.


Susan, author of TheWell Seasoned Cook who is also a founder of this event is hosting Black and White Wednesday #102. Now Cinzia of  Cindystarblog  looks after admin duties for Susan's Black and White Wednesday Event. For all guidelines  and an index of  all future event hosting blogs please check Cinzia's  post here. Participants can join Flickr group created for B&W event. Next event (BWW #103, 30th October-2013- Hallowen Edition) will be hosted by Lynne  of  CafeLynnylu


Caterpillar took  three hours to finish eating one stem of Parsley.
I had plucked and placed it over  side walk, later moved it over mulch.
(Check lower right image for end result.)


Black and White Wednesday
 Event #102, 23rd October-2013

Tuesday, October 8, 2013

Sliced Zucchini - Black and White Wednesday #100

Tomorrow, 9th October 2013,  Black and White Wednesday event  will be celebrating its 100th  Edition. Cinzia  of  Cindystarblog is  hosting this event who also takes care of admin duties for this event. Susan, author of TheWell Seasoned Cook is a founder of this event. For all guidelines  and an index of  all future event hosting blogs please check Cinzia's  post  here. Participants can join Flickr group created for B&W event. Next event (BWW #101, 16th October-2013) will be hosted by Urvashi of  BuddingHomeMaker.

This week I am submitting my 15th Black and White image. It was a great joy to participate in this event, it added a unique personality to my blog, initiated more creativity and helped me to improve food photography. Thanks to Susan , Cinzia and all the bloggers who hosted this event and shared their beautiful images. My this weeks image is  sliced Zucchini. I clicked this image before cooking  stir fry for lunch. I love to cook with Zucchini for its taste, texture and green and white color contrast. 

Sliced Zucchini


Black and White Wednesday
 Event #100

Thursday, September 19, 2013

Cabbage Cilantro Paratha made with self raising flour. {Tava fried Hara Dhania and Band gobi kulcha.}

These cabbage-Cilantro parathas were made in the morning to pack for lunch. Morning short time frame always stimulate me to create good  vegetable based recipes. This time I choose to use self raising all purpose flour instead of regular wheat flour. They are generously packed with fresh cabbage and cilantro, mildly seasoned with ajwain /carom seeds, for extra soft texture sour cream and vinegar is used. Preparing dough, rolling, patting needs some extra care and efforts due to good quantity  of veggies and herb in the dough. Result is good taste, nice Kulcha style appeal, I can also call them as Cabbage-Cilantro griddle fried Kulchas.
Published on june 17,2014.


Ingredients :-
  • 1 Cup -  heaping self raising all purpose flour
  • 3/4 Cup - very finely thread like sliced cabbage -(1/2 - 1 inch long)
  • 1/4 T.spoon - ajwain/Ova/Carom seeds
  • 1 Cup - roughly chopped fresh cilantro,hard stem portion chopped finely.
  • 2 Green chillies - finely chopped
  • 1 Tb.spoon - heaping sour cream
  • 1/2 T.spoon - vinegar
  • 3 Tb.spoon - oil + more to drizzle over parathas.
  • 2-3 Tb.spoon - water for kneading


How to prepare Cabbage Cilantro Paratha/Kulcha :
  1. Take a small piece of cabbage, slice it into very thin thread like pieces not more than 1 inch long. Based on the size of cabbage piece you may get longer threads, just chop further into an inch size. This can be done either with knife or slicer. I have sliced it with the knife. Transfer to a medium size bowl.
  2. Separate cilantro stem and leaves, roughly chop the leaves and finely slice hard stems into tiny pieces. Keep few tender stems 1 inch long for nice appeal over rolled paratha. Transfer chopped cilantro and stems into the bowl.
  3. Add 1 cup heaping self raising flour, 1/4 tsp ajwain/Ova, 2 finely chopped green chillies, 1/2 tsp vinegar, 1 heaping tbsp sour cream to the bowl. Add only a pinch of salt because self raising flour contains good quantity of salt. Mix all well, merge into a ball, smear  1 tbsp oil around ball then start kneading again. Add 2-3 tbsp water and try to merge dough into smooth ball. If it is sticky, sprinkle some flour, knead again by coating dough ball with more oil.
  4. Divide dough into 4-5 equal size  balls. Oil your palm and fingers, hold each ball between palms and roll to form smooth ball, lightly dust with flour, keep it aside.
  5. Start rolling ball with light pressure, turn clock wise, if required very lightly dust with flour. Roll up to six inch diameter.
  6.  place it over griddle. Start with medium low heat, after 30-40 seconds flip and fry for another 30-40 seconds. Fry by flipping 3-4 times. Pat edges and center with Chapati press or ball of paper towel  for even frying. Spray some oil over and around edges. Momentarily increase heat  to medium but don't let paratha get dark burnt spots. Maintain golden brown spots. It takes around 2.5 to 3 minutes to fry each paratha. Multiple actions will perfectly roast each paratha.  After frying stack them over paper towel lined plate, once they are cooled but still warm, cover with dome lid.
  7. Serve with sour cream, yogurt, ranch dressing or pickle. Make it more interesting by garnishing paratha with chopped raw cabbage, sliced raw onion rings, fresh cilantro sprigs and sliced lemon wedge.


Sunday, September 15, 2013

Onam Pookalam / Floral rangoli for Kerala Onam Festival. {Simple Pookalam with garden flowers, Leaves, wild Chinese Privet berries and Pampas grass}

Tomorrow is Onam,  Kerala's  prime festival  associated with the legendary noble King Mahabali. Beautiful floral carpets are laid on the floor at the entrance of the homes to welcome King Mahabali.  I love onam ritual of floral Rangoli. In this post  I am sharing two pookalam images, one from  year 2011 and another from 2012, both pookalams were  done with available garden and store brought flowers. Traditionally Pookkalams are round floral patterns but last  year I made square floral design. I have used some wild green berries (Chinese Privet, Ligustrum Sinense) and Pampas grass. These are very simple Onam pooklam patterns one can make with available flowers. I have mostly used whole flowers  instead of pinched petals. Enjoy few additional images of Chinese Privet berries  and Pampas Grass captured around home.

Wishing all my readers, followers and visitors a very Happy and Blessed Onam!!


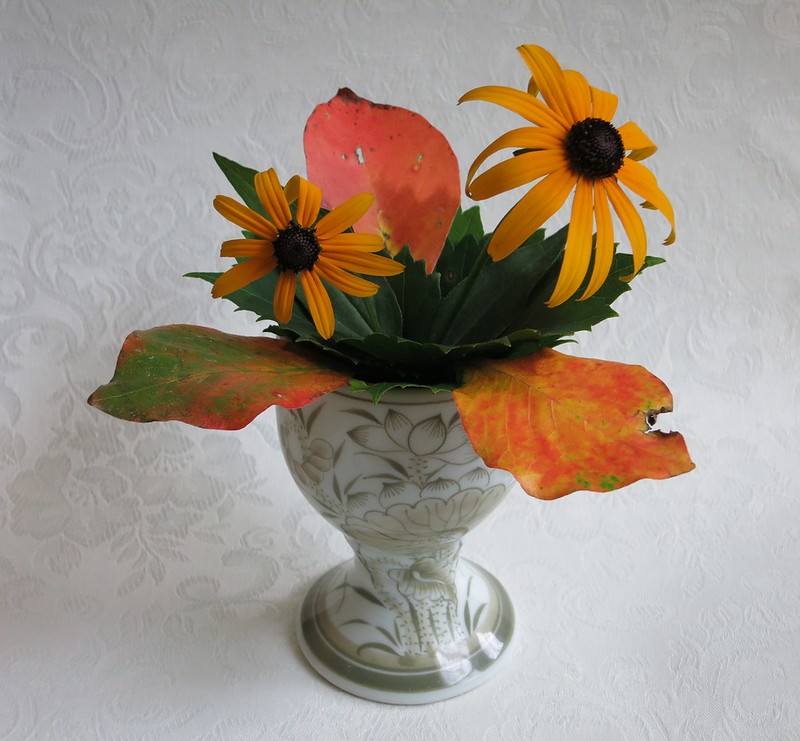
Flowers and berries before setting Onam Pookalam.


Pampas Grass.

Chinese Privet berries captured today morning. 
In fall they turn black, scroll down to check more images 
taken during different  season and weather conditions.

Chinese Privet berries captured on 28th October 2012.


Image taken on 16th November -2012

Image taken on 12th January 2013, on a cold, misty Day.

~-~-~-~-~-~-~-~-~-~-~-~-~-~-~-~-~-~-~-~-~-~-~-~-~-~-~-~-~-~-~-~

Ona-Pookkalam (09/29/2011)


Tuesday, September 3, 2013

Home made Purple Sweet Potato Chips and Plantain Chips {Black and White Wednesday # 95}

This week for Black and White Wednesday event I am submitting image of  home made Purple sweet potato chips and plantain chips.  I made these chips over labour Day long weekend for evening  tea time snack. I had two green raw Plantains and one  purple sweet potato, It took me around 45 minutes to prepare these deep fried chips. I simply peeled the skin of plantains and sweet potato, directly sliced it over oil Kadhai. My slicer blade makes extra thin slices. Per banana I got above 100 chips and total yield was little over two cups. Sweet potato, I got 1.5 cups chips. I seasoned  chips with  extra fine ground sea salt.

Deepali  from Lemon In Ginger  is hosting Black and White Wednesday Event #95. Susan, author of TheWell Seasoned Cook is a founder of this event. Now Cinzia of  Cindystarblog is a new admin for Susan's Black and White Wednesday Event. For all guidelines  and an index of  all future event hosting blogs please check Cinzia's  post here. Participants can join Flickr group created for B&W event. Next event (BWW #96, 11th Sept-2013) will be hosted by Haalo  of  Cook allmost anything.

Home made Purple Sweet Potato chips & Plantain Chips


Black and White Wednesday
 Event #95, 4th Sept-2013

Saturday, July 20, 2013

Mix Vegetable Vegan Halwa with Bottle gourd, Carrots and Chioggia Beets. {Indian Vegan Dessert with vegetables.}

Indian sweet "Halwa"  can be prepared with different flours, Dals, Nuts, Fruits and vegetables. Today I am sharing  recipe of Halwa made with three vegetables. I had  one organic Chioggia beet, few locally grown tender carrots in the refrigerator, quantity was not sufficient to make three servings of Halwa so  I added one  Lauki / Dudhi  and made  this Three vegetable Halwa. I skipped adding milk , used  extra virgin coconut oil so it turned  vegan halwa. For rich taste and additional nutrition I added coarse ground  almond meal and Hemp hearts. After cooking bright natural color of vegetable was  lost but Halwa tasted  absolutely delicious.


 Halwa Ingredients : (3 servings of Halwa)
  • 1 Dudhi / Bottlegourd / Lauki - grated, yield 2.5 cup tightly packed.
  • 1 Chioggia Beetroot - grated -(yield 1 cup tightly packed) regular beets can be used.
  • 8-10 young  carrots - grated - (yield 1 cup tightly packed) use any type of carrots.
  • 5-6 Tb.spoon - extra virgin coconut oil (I used Carrington Farms from costco.)
  • 5 Tb.spoon - Hemp hearts (raw shelled hemp seeds.)
  • 1/4 Cup- coarse ground almond powder
  • 4-5 Cardamom - finely ground seeds
  • 3 Tb.spoon - Golden raisins
  • 4 Tb.spoon - slivered almonds
  • 3/4 cup sugar - extra 3-4 Tb.spoon for  more sweetness.

Lauki , Gajar and Chioggia Beet.


Grated Beetroot, Carrots and Dudhi.

Method of making Mix vegetable Halwa.
  1. Cut both the ends of Bottle gourd, peel the skin. Keep the seeds if they are extra tender. If seeds are grown then remove inner seed portion. Grate by using grater as shown in the image or use food processor. Keep it aside. (Bitter tasting bottle gourd  should not be consumed due to its  toxic properties.)
  2. I used organic locally grown carrots so didn't peel the skin but thoroughly washed it under running water by rubbing the skin to get rid of soil. Grate it by using grater or use food processor. Peel the skin if you are using regular carrots.
  3. For Chioggia beets I  partially peeled the skin from rough root grown portion. Don't peel off clean dark pink skin. Grate and keep aside.
  4. Gently squeeze juice from grated veggies. Do not squeeze out all juice, one or two times gentle hand squeeze is enough. I got around half cup juice, drink it up or use it  in cooking.
  5. In a small saute pan heat 1 tbsp coconut oil, add golden raisins in two batches, stir fry by stirring continuously until raisins swell to round shape and turn light brown. Keep heat low to avoid burning. Drain over paper towel. Next add little more coconut oil in the same pan, fry slivered almonds until light brown. Drain on paper towel.
  6. Heat 3 tbsp extra virgin coconut oil in a heavy gauge pot. I took 4 quart hard anodized pot. Add all grated vegetables, cook over medium heat for 20 minutes, stirring often. Add powdered cardamom seeds when you are half way through cooking process. If mixture gets too dry spray some water to retain moisture.
  7. Now add 1/4 cup coarse ground almond powder, mix well, cook for five minutes, stirring often.
  8. Next add 3/4 cup sugar, once sugar melts, veggie mixture will turn loose in texture, continue to cook until mixture forms thick pulp like texture. Taste sweetness, if required add 3-4 tbs more sugar.
  9. Now add 5 tbsp hemp hearts (optional) and 2 tbsp coconut oil, mix well, continue to cook for 6-7 minutes or until mixture achieves your desired halwa texture. Add fried raisins and slivered almonds, mix well. (save few for final garnish) Let it cool down completely before serving. You can serve in a bowl or shape in your choice of moulds.

Friday, July 19, 2013

Palamedes Swallowtail Butterfly feasting on nectar of Bull Thistle Flower. {Bull Thistle Plant in Yard - Part 1}

Last year summer one wild plant grew near  our patio door admist  Mint plants, It was tiny with five six leaves, I didn't think much and  left it in the ground, it survived harsh winter and by spring it started to grow taller with beautiful  thorny leaves. Google search based on the  leaf description yielded me result of  Bull Thistle Plant. (Cirsium vulgare) In the month of May it started showing signs of bloom and by first week of June beautiful purple thistle flowers started blooming all over the plant. On July 4th  one beautiful Palamedes Swallowtail Butterfly came in search of nectar,  it stayed around flowers for few minutes and that gave me good chance to capture images through Patio glass door. Butterfly images are taken around  11.15 a.m., it was very bright sunny day, glass door acted as a nice filter. I am glad to share these images with you. I will have one more post coming up with American Gold finch images taken while enjoying Bull Thistle seeds. They take several rounds to eat thistle seeds and today one female finch started collected white silky texture material from seeds to use in her nest. Now Thistle bloom is ending, plant is drying and collapsing. Today I removed two dried stems. I am glad that I left this Bull Thistle plant to grow, it was great joy to see it growing and frequented by Gold finches, butterflies, bees and insects.


Simple flower arrangement with Bull Thistle flowers.


Bumble Bee sipping nectar from Bull Thistle Flower.


Dried Bull Thistle flower head.


Palamedes Swallowtail Butterfly

Bull Thistle plant is full of spines.


Opened dried Thistle flower head with  silky fiber.


Female American gold  Finch  picking up Bull Thistle seeds.