Thursday, June 27, 2013

Basil & Broccoli Paratha {Indian Roti / unleavened flat bread enriched with Broccoli and Thai Basil.}

I had fresh Broccoli and a big bunch of  fresh Thai Basil from local farms. I made parathas using these two good ingredients to pack in the lunch box. I have added some organic sprouted wheat flour with regular Indian chapati aata to boost nutrition. Crushed Onion, Garlic, Cumin  is added  to enhance flavor and taste.


Ingredients :
(Makes 6 Parathas/ Unleavened Flat breads.)
  • 1 + 3/4 Cup -Wheat flour ( I took 1 cup Indian atta and 3/4 cup sprouted whole wheat organic flour)
  • 5-6 small Broccoli florets along with tender stems - yield 1 Cup roughly chopped broccoli.
  • 3-4 Tb.spoon whey or 1/4 cup yogurt
  • 25-30 Thai Basil leaves along with tender stems
  • 1/2 medium size onion - chopped - yield 1/2 cup
  • 2 Green chilies - chopped
  • 3-4 cloves of garlic - slice each into 2-3 pieces
  • 1 T.spoon - roasted Jeera / cumin powder ( whole cumin or raw jeera powder can be used.)
  • 1/2 T.spoon - Turmeric powder
  • 1/2 T.spoon - Salt
  • 1 Tb.spoon oil  +  more oil to drizzle over paratha.
Preparing paratha dough.
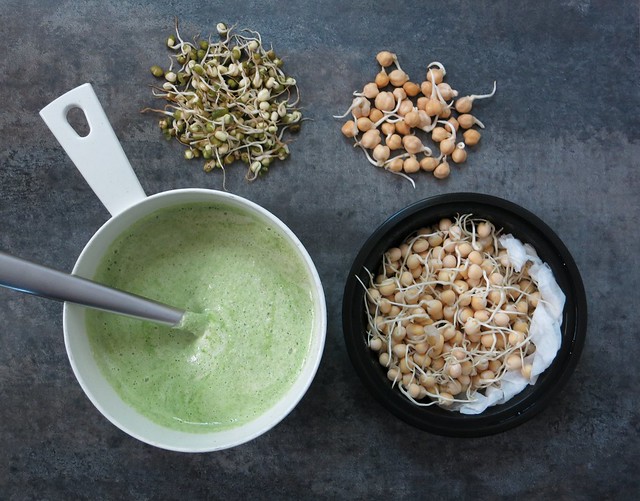
Yogurt / Dahi


How to make Broccoli & Basil Paratha.
  1. Chop roughly 5-6 small size broccoli florets and stems, to  get one cup yield. Cut onion into small pieces to get 1/2 cup yield. Chop green chilies and slice garlic cloves into 2-3 pieces. Combine all ingredients with 6-7 basil leaves  in a small blender, crush to coarse texture without adding water. (In absence of blender use grater or microplane.)
  2. Roughly chop 20  basil leaves, finely chop tender stem portion. Keep it aside.
  3. In a medium size bowl add 3/4 cup organic sprouted wheat flour and 1 cup regular Indian chapati aata, roasted cumin powder, turmeric, chopped basil leaves and grated mixture of broccoli-onion, 1/2 tsp salt. (You may use plain organic flour instead of sprouted wheat flour or adding multigrain flour will also work.) Mix all together to make moist dough. Juices from herbs and broccoli won't be enough to bind the dough so add 3-4 tbsp yogurt whey or mix of whey and  yogurt to make dough. Once the dough is bound together, smear with 1 tbsp oil and knead  few more minutes to make  a soft dough.
  4. Divide dough evenly into 6 balls, lightly dust with flour. Apply few drops of oil over palm, then  rotate  each ball  between palms to make smooth dough ball. Roll each ball into 5 inch wide circle.
  5. Heat the griddle over medium heat. Place rolled paratha, after 30-40 seconds spray little oil over the edges of paratha, spray few drops in the center. Slow roast over medium heat, flip few times and fry until light brown spots appear over both the sides of paratha. Give 2-3 minutes fry time for each paratha.
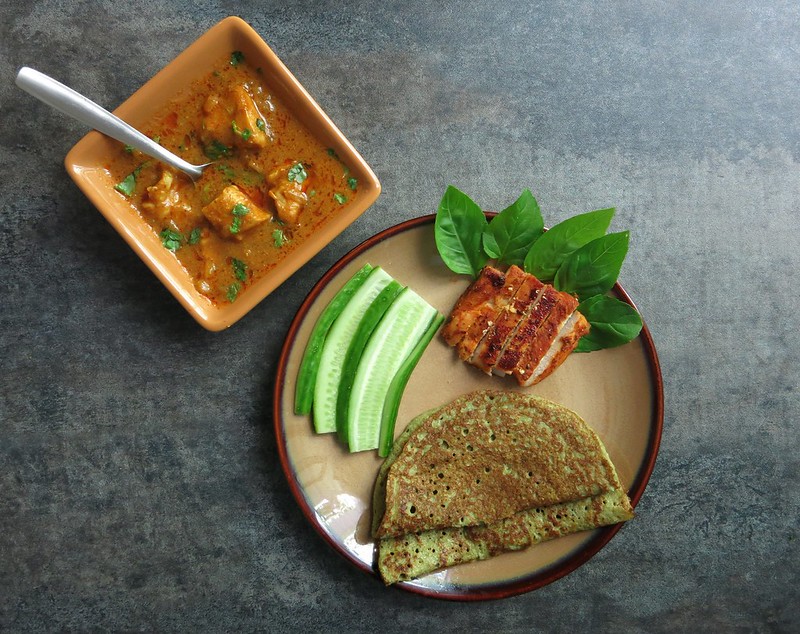
  6. Serve with thick creamy yogurt or sour cream or cream cheese. 
Basil, Broccoli ke Parathe.

Wednesday, June 19, 2013

Spinach Pinto beans Stir fry with Ginger, Garlic & cumin Tempering and an additional enrichement with Extra Virgin Olive Oil. {Cooking with Greens & Beans}

Greens and Beans is a good combination to cook for every day meals. During Memorial Day weekend I had brought  huge baby spinach bag from Indian store. I used it for making spinach parathas, spinach stir fry with moong beans and this stir fry by adding Pinto beans. This is regular stir fry  with some difference, at end I did tempering with ginger, garlic, cumin, hing (asafoetida) turmeric, added extra tsp of cold extra virgin oil olive. This added additional layer of taste, texture and enrichment. I had no plan to blog this recipe but tempering made good difference, so I  decided to take an  image, it was 8 past and light was very low. In just 5 minutes managed to get 6-7  images placing dish on the patio, got 3 clear enough images to share. Any  type of greens and beans combination can be used to cook this stir fry.


Ingredients :
  • 10-12 - generous handful fresh spinach leaves. (I used baby spinach) or 1lbs frozen chopped spinach.
  • 1 Medium size onion - chopped finely
  • 2-3 small Green chilies - finely chopped
  • 1 Pinto beans Can - 15 oz size, drained and rinsed.
  • 1 Tb.spoon oil + 1 T.spoon oil for tempering + 1 T.spoon - extra virgin olive oil
  • 6-7 large size Garlic cloves - sliced lengthwise
  • 1.5 inch cube of ginger - cut extremely fine into slices.
  • 1 T.spoon - Cumin / Jeera
  • 4 pinches - Hing
  • 1 T.spoon Turmeric


How to make Spinach and Pinto beans stir fry :
  1. Heat 1 tbsp oil in a big size open saute pan, add chopped onions, saute for 7-8 minutes over medium heat, stirring often. Add chopped green chilies, saute for 30 seconds then start adding  chopped spinach in batches, 2-3 handful at a time, stir and turn  few times until spinach slightly wilts. Repeat same process for next batches. Allow to  Cook over high heat for 8-10 minutes, stirring often.
  2. Next by using immersion blender roughly blend spinach and onion saute, Do not make fine puree. Add rinsed and drained Pinto beans, salt. cook for 5-6 minutes over medium heat.
  3. Lower heat to lowest setting  while you prepare Tadka.
  4. Heat  1 tsp oil in a very small pan or Tadka Pan over medium heat. First add julienned ginger - saute for one minute, then add sliced garlic - saute for one minute. Next add 1 tsp cumin, 4 pinches of hing, 1 tsp turmeric. saute for one minute, stirring continuously.Shut off the heat, add 1 tsp extra virgin olive oil. Transfer Tadka over spinach and pinto bean saute. Mix well. shut off the heat, let  it stand some time before serving with  roti or rice. You can use this saute as wrap and sandwich filling.
Palak and Pinto beans sabji.

cooked on 27th May, published on 19th June2013.

Tuesday, June 18, 2013

Herb flavored Green beans and Beetroot Stir Fry. {Black and White Wednesday # 88 }

This week for Black and White Wednesday event I am submitting image of Green beans and Beetroot stir fry. This  Kerala style Thoran  gets refreshing  twist from use of  fresh sage and Greek Oregano herb. Generally fresh grated coconut it used but I additionally garnished  this stir fry  with  generous quantity of fresh coconut shavings.

Sreevalli from Ammaji Recipes is hosting Black and White Wednesday Event #88. Susan, author of TheWell Seasoned Cook is a founder of this event. Now Cinzia of  Cindystarblog is a new admin for Susan's Black and White Wednesday Event. For all guidelines  and an index of  all future event hosting blogs please check Cinzia's  post here. Participants can join Flickr group created for B&W event. Next event (BWW #89, 26th June-2013) will be hosted by Lynne  of  CafeLynnylu


Herb flavored Green beans and Beetroot Thoran.


Black and White Wednesday
 Event #88, 19th June-2013

Wednesday, June 12, 2013

Growing Garlic in a pot. {Black and White Wednesday #87}

This is my  eleventh image submission for Black and White Wednesday event #87, 12th June, 2013. Jasmina from JazzyKitchen is hosting the Event. Susan, author of TheWell Seasoned Cook is a founder of this event. Now Cinzia of  Cindystarblog is a new admin for Susan's Black and White Wednesday Event. For all guidelines  and an index of  all future event hosting blogs please check Cinzia's  post here. Participants can join Flickr group created for B&W event. Next event (BWW #88, 19th June-2013) will be hosted by Sreevalli  of  AmmajiRecipes.

This week I am submitting image of pot harvested Garlic. Many times I collect  vegetable scraps and waste, add it in pots with layers of soil, dry leaves. After few months that pot yields healthy soil. During September -October month I had put some vegetable waste in the pot, it had some sprouted garlic cloves. After few days I noticed  few  green sprouts in the pot.  I doubted it to be Garlic. After few days  one more small garlic plant rose up. We had quite harsh winter this year but Garlic plants stood all green and healthy. By early first week of June I pulled out small plant and was amazed to see tiny garlic bulb. On 9th June  I took out the big one which has a big size garlic bulb. I have placed  both bulbs in a basket  to dry. It took around 8-9 months to harvest garlic in a pot. Now I plan to press few more sprouted garlic cloves in a containers. Scroll down to see more images of Garlic plant.

{B&WW#87]  Pot Harvested Garlic.


Cold, frosty, snowy weather kept Garlic plants all Green.
Image taken in mid January.

By end of the March Garlic plant was well grown.

By second week of June stem started to dry out. 
It was time to pull out garlic plant.

A well grown garlic bulb out of pot.

small garlic bulb was pulled out one week before.
All most   8-9  months to harvest  garlic in a pot.


Black and White Wednesday
 Event #87

Wednesday, June 5, 2013

Sattvic Lunch - Rice and Tofu Curry in Yu Choy Puree. {Black and White Wednesday #86}

This is my Tenth image submission for Black and White Wednesday event #86, 05th June, 2013. Deepali Jain from Confusion Cook is hosting the Event. Susan, author of TheWell Seasoned Cook is a founder of this event. Now Cinzia of  Cindystarblog is a new admin for Susan's Black and White Wednesday Event. For all guidelines  and an index of  all future event hosting blogs please check Cinzia's  post  here. Participants can join Flickr group created for B&W event. Next event (BWW #87, 12th June-2013) will be hosted by Jasmina of  Jazzy Kitchen.

This week I am submitting image of Sattvic lunch plate. This is simple rice and vegetable-tofu curry lunch served with warm cumin infused water. Curry is made in sliced green capsicum and yu choy puree gravy base without adding onion and garlic, it is cooked in coconut oil. Garam masala is not used, it is seasoned with cumin corriander powder and fresh ginger.

Sattvic Lunch - Rice and Tofu curry


Black and White Wednesday
 Event #86